Six Mac productivity hacks every entrepreneur needs to know
After sheer will power, technology is the second best bet for increasing your productivity. That is, if you know how to use it. That's why I want to share six less common Mac productivity tips with you. Implement one or all of these and you will see a noticeable productivity improvement.
Use Preview to flawlessly sign documents
Signing electronic documents is so much easier than signing physical documents. You could pint, sign and then send the documents either by fax, by mail, or scan them and email them back. Or you could simply insert your signature in the document. Here's how to do this:
- Launch Preview. Open its preferences from the menu, or by pressing ⌘,
- Click on the signatures tab, then add a new signature.
- A Signature Capture will appear, and your Mac's camera will turn on.
- Write your signature on a piece of paper and place the paper in front of the camera so the signature aligns with the blue line in the left viewer area.
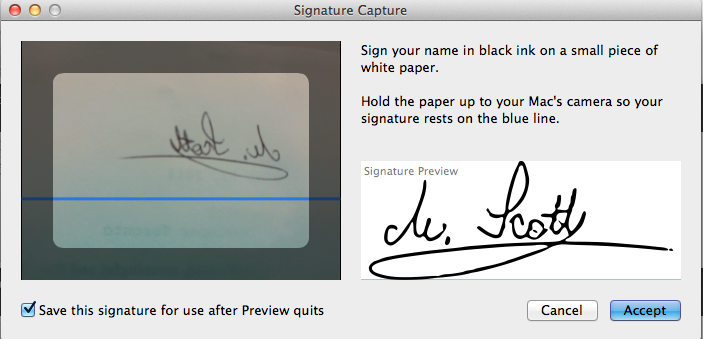
- Click the Accept button and the signature will be added to Preview's list of signatures.
To insert your signature in a PDF, go to Tools -> Annotate -> Signature. Select your signature from the menu. A crosshair cursor will appear. Drag it to make your signature appear in the document. Now you can drag the signature wherever you want it to appear, and resize it if necessary. Save the PDF and your signature will be saved in the document.
Use dictation for faster text input
Remember back in the 60s when the boss would dictate letters to the secretary? Haven't you ever dreamt of being the boss, pacing around the office and dictating your emails to someone who types them with the same speed you're thinking? You can do just that with dictation. Here's how to set it up:
- Click Apple () -> System Preferences
- Choose Dictation & Speech
- Click 'On'
- Check 'Use Enhanced Dictation' so that you can use dictation offline and so you can dictate continuously (if you don't check it, you'll only be able to dictate for 30 seconds at a time)
- Choose your keyboard shortcut (Fn key twice seems to be a quick one and easy to remember)
- You can also choose another language
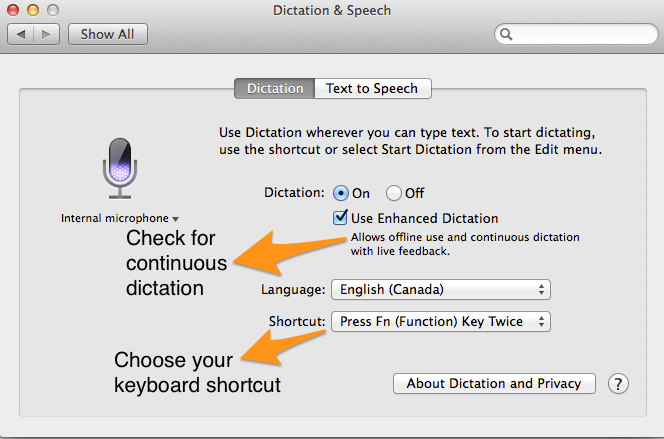 To start using dictation, select a text field (for example, the body of your email) and either press your shortcut, or select Edit -> Start Dictation. A mic will appear to the left of your window. Start dictating and when you finish click Done or press the Fn again. Your words will appear in the text field.
Aggregate your calendars with iCal
You can aggregate all your events, meetings and appointments from different calendars by adding iCal feed URLs to your Calendar application.
To do so, generate the iCal feed URL from within the application that you desire to sync. For example, you can sync Sandglaz tasks to your calendar by getting the iCal feed URL from the Share settings of any grid.
Open up your the Calendar application and click File -> New Calendar Subscription. Then copy and paste the iCal URL and click subscribe.

Now you can name the calendar, choose customize the settings, and choose how often you want the calendar to refresh - from never to every 5 minutes to every week.
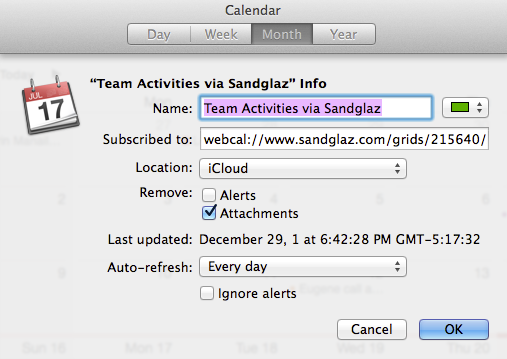
Following the same steps, you can add calendars from your Google Calendars or any application that will generate an iCal URL. Now all your events from different applications can be nicely aggregated in a singe view and colour coded! And if you choose the iCloud location for your calendars, they will automatically sync up with your other Apple devices that share the iCloud account.
Clean up your virtual desk with Spaces
Spaces is one of the most underrated Mac features. It's an instant productivity hack that allows you to create multiple desktops. Whether your projects are piling up and you want to declutter, or you simply want to keep work and play separate, Spaces is the Mac equivalent of cleaning your desk and keeping it clean. They allow you to place certain applications on different desktops, so that you don't open all your apps in one desktop, making it impossible to focus on a single task.
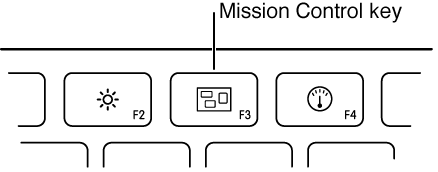
To add spaces, zoom to Mission Control by either pressing the Mission Control key, pressing control + up arrow, or swiping up with three or four fingers (depending on your trackpad settings). You will see all the applications that you have open, and all the desktops at the top of the screen.
Click the + sign in the top right corner to add a new desktop.

To move from one space to another, you can either:
- Swipe left or right with three or four fingers through your spaces,
- Zoom to Mission Control and click the desktop you want to use, or
- Press control + right/left arrow key to scroll through spaces.
Now you can start assigning different apps to desktops. Again, there are several ways of doing this. Choose your favourite from these:
- Click on the expand icon on the top right corner of any window. This will instantly make the application full screen and give it its own desktop, without you having to create a new one.
- Zoom to Mission Control, and drag the window up to the space you want to use
- Right click an app's icon in the Dock and scroll over options. Choose if you want the application to show on All Desktops, This Desktop or none.
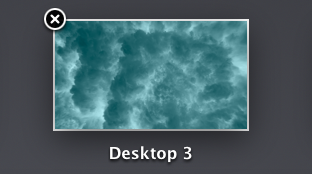
To delete a desktop, zoom to Mission Control and hover over the desktop. A delete button (x) will appear - click it to delete the desktop.
Adjust screen brightness and volume in increments
Sometimes you need to get the perfect volume or screen brightness. But, let's say, the volume up button makes the audio too loud, and the volume down too low. There's a way to increase the volume or the brightness in increments so that you can hit the exact spot you're looking for.
Press Option + Shift as you adjust screen brightness or volume, and you'll see adjustments in 1/4 increments.

Adjust your volume setting quietly
You know that 'quack-quack' sound that Macs make when you turn your volume up or down? Let's say you're in a board meeting and you forgot to turn down the volume. No worries! Just press Shift + Volume to adjust your volume quietly. Nobody else needs to know!
What are your favourite Mac productivity hacks? Share them with other readers in the comments below!